• WORK
  • RESUME
  • ABOUT ME
  • CONTACT
Emmanuel Carrillo
  • WORK
  • RESUME
  • ABOUT ME
  • CONTACT

Flashing Simon K ESCs

I still hear of people having problems using SimonK on Brushless ESCs. Well, once you find an ESC with a SimonK Bootloader, your work is basically done, and programming should be a breeze if you use the right GUI software. If you have an Atmel or Silicon Labs based ESC that does not have a SimonK bootloader, you can use the USBasp chip connectors or clip onto the serial Debug lines.

The SimonK bootloader is a bit of code on the ESC micro that allows the micro to get a request to load firmware from the RX signal line. Most SimonK loaded ESCs have the Bootloader. If you look through comments on Banggood or Hobbyking, most people will note it. An Afro Programmer is a simple brand of a USB to Serial loader.

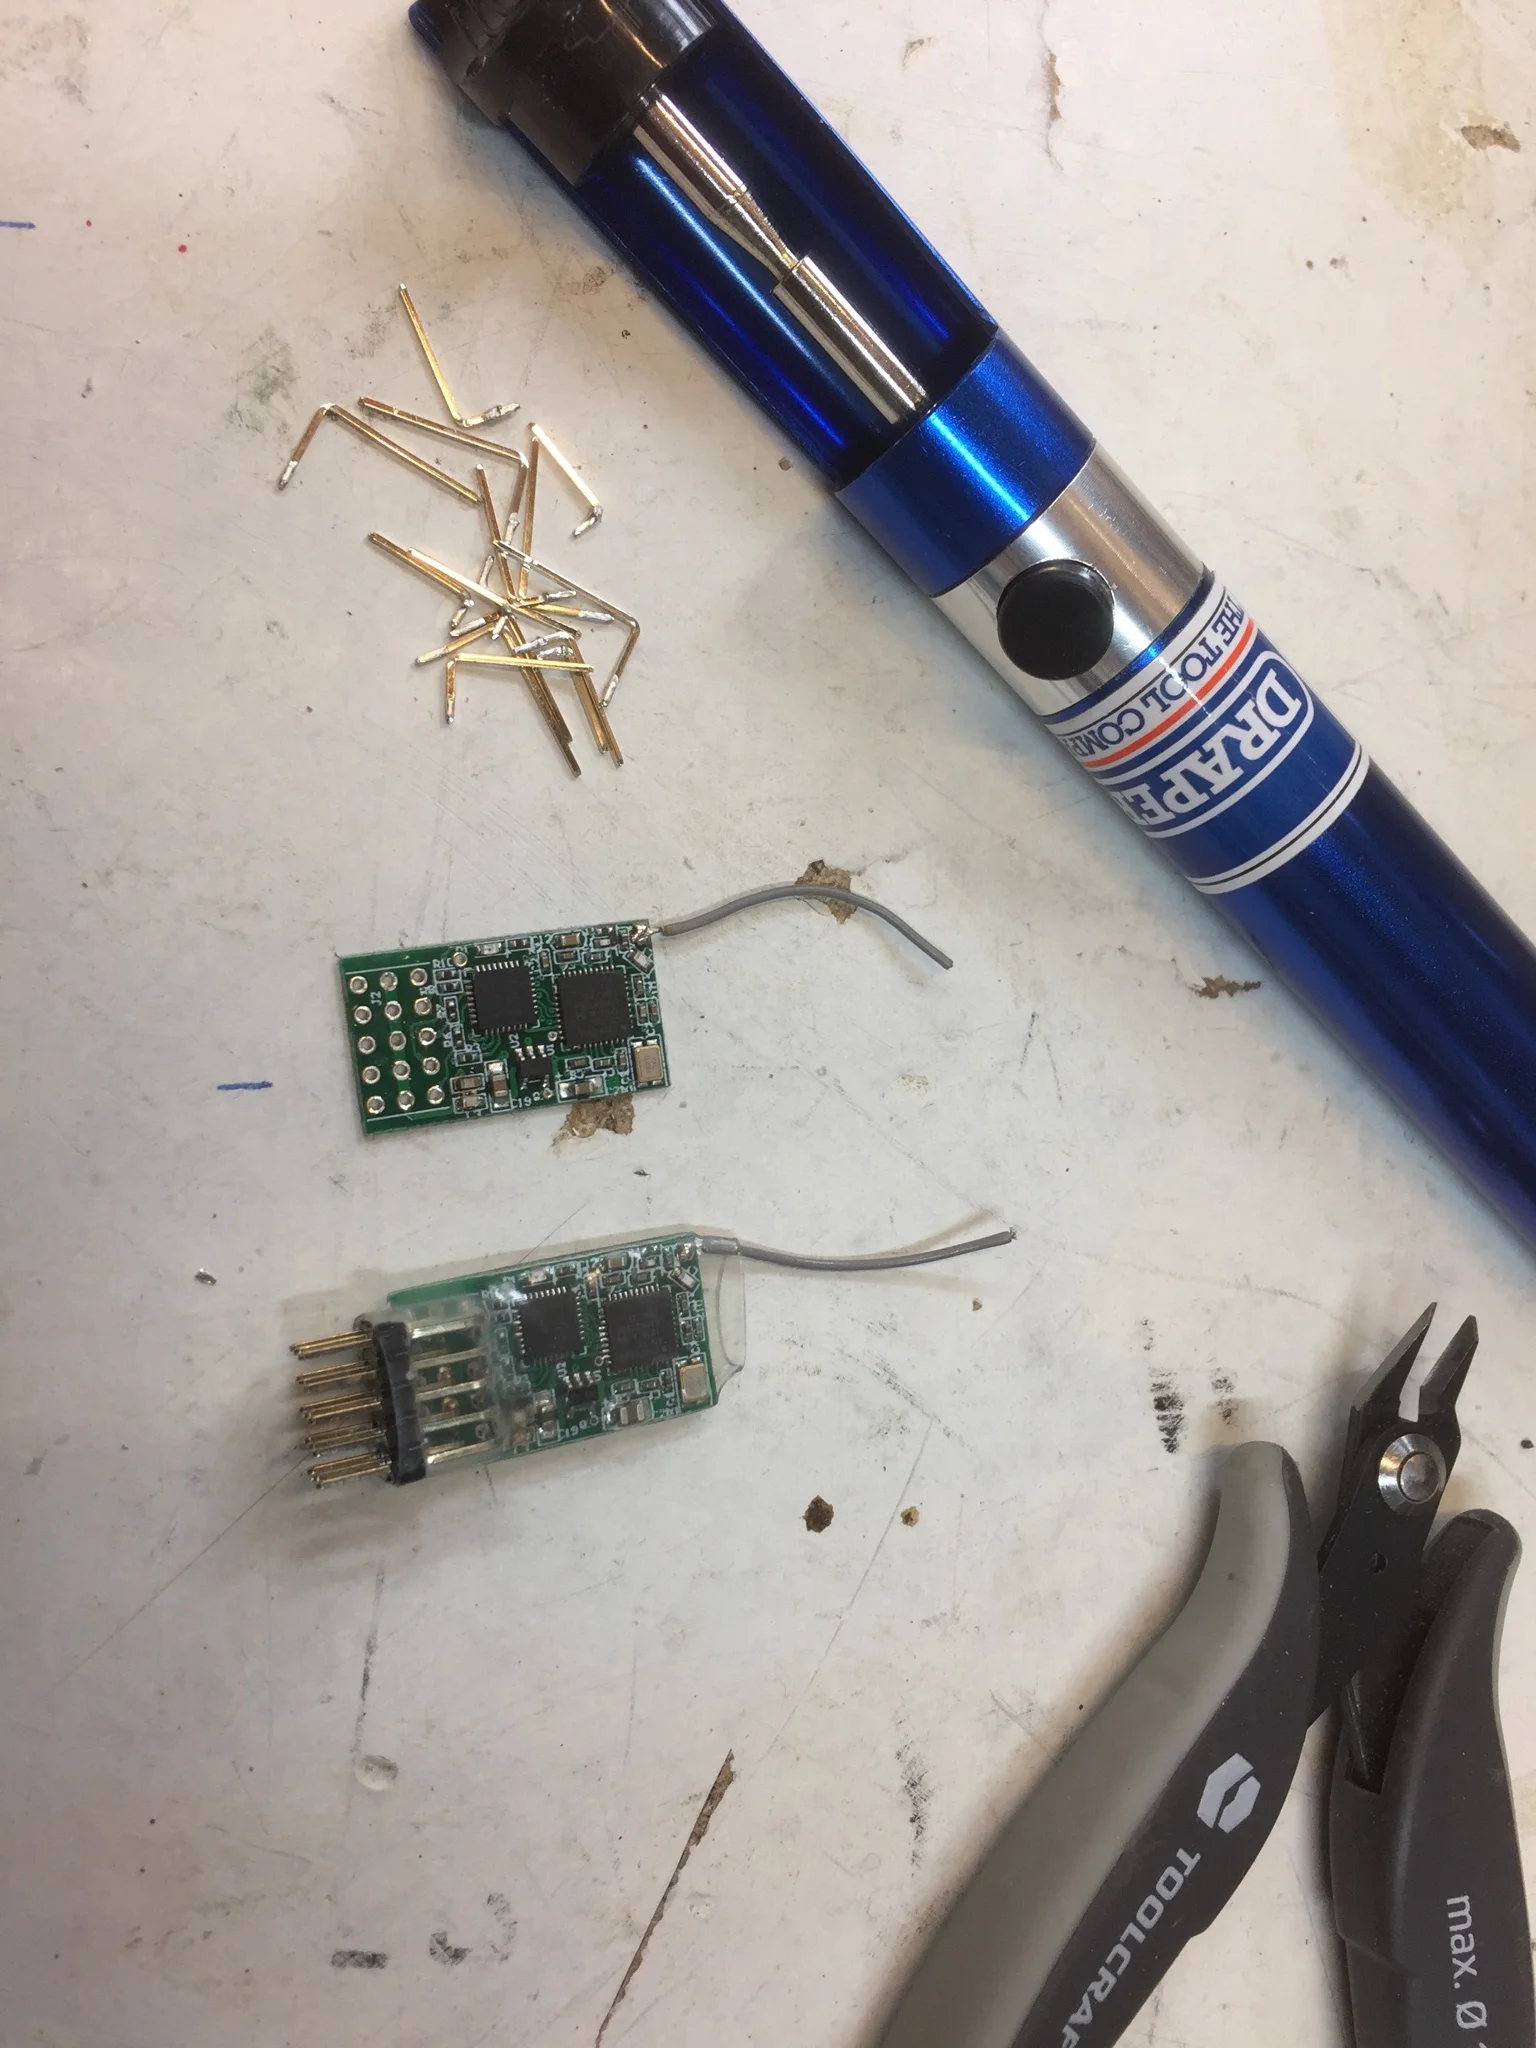
If the Micro of the ESC is compatible with SimonK, but does not have the bootloader, you basically have to enter into the Micros Debug or programming mode through several debug pins. This requires a bit more skill than I will attempt, so I stick with the readily available ESCs with the Bootloader.

Now, regardless of the hardware, you need a GUI to program the ESC. Many of you painfully use the KK Multicopter Flash tool. Stop using this, it is not user friendly and requires way too many steps to get it right. Newbies will pull their hair out. There is a better tool, the Rapid Flash Tool available from the Google appstore is the best.

https://chrome.google.com/webstore/detail/rapidflash/gehadojofkekobiohnefkabgimeniglh?hl=en&fbclid=IwAR0wTXXWFtZKXYKtYcFH0W1c0wRyMiSoo9Jcc6cj7TG9LGeWbqiFLbq3RdM

r1.jpg

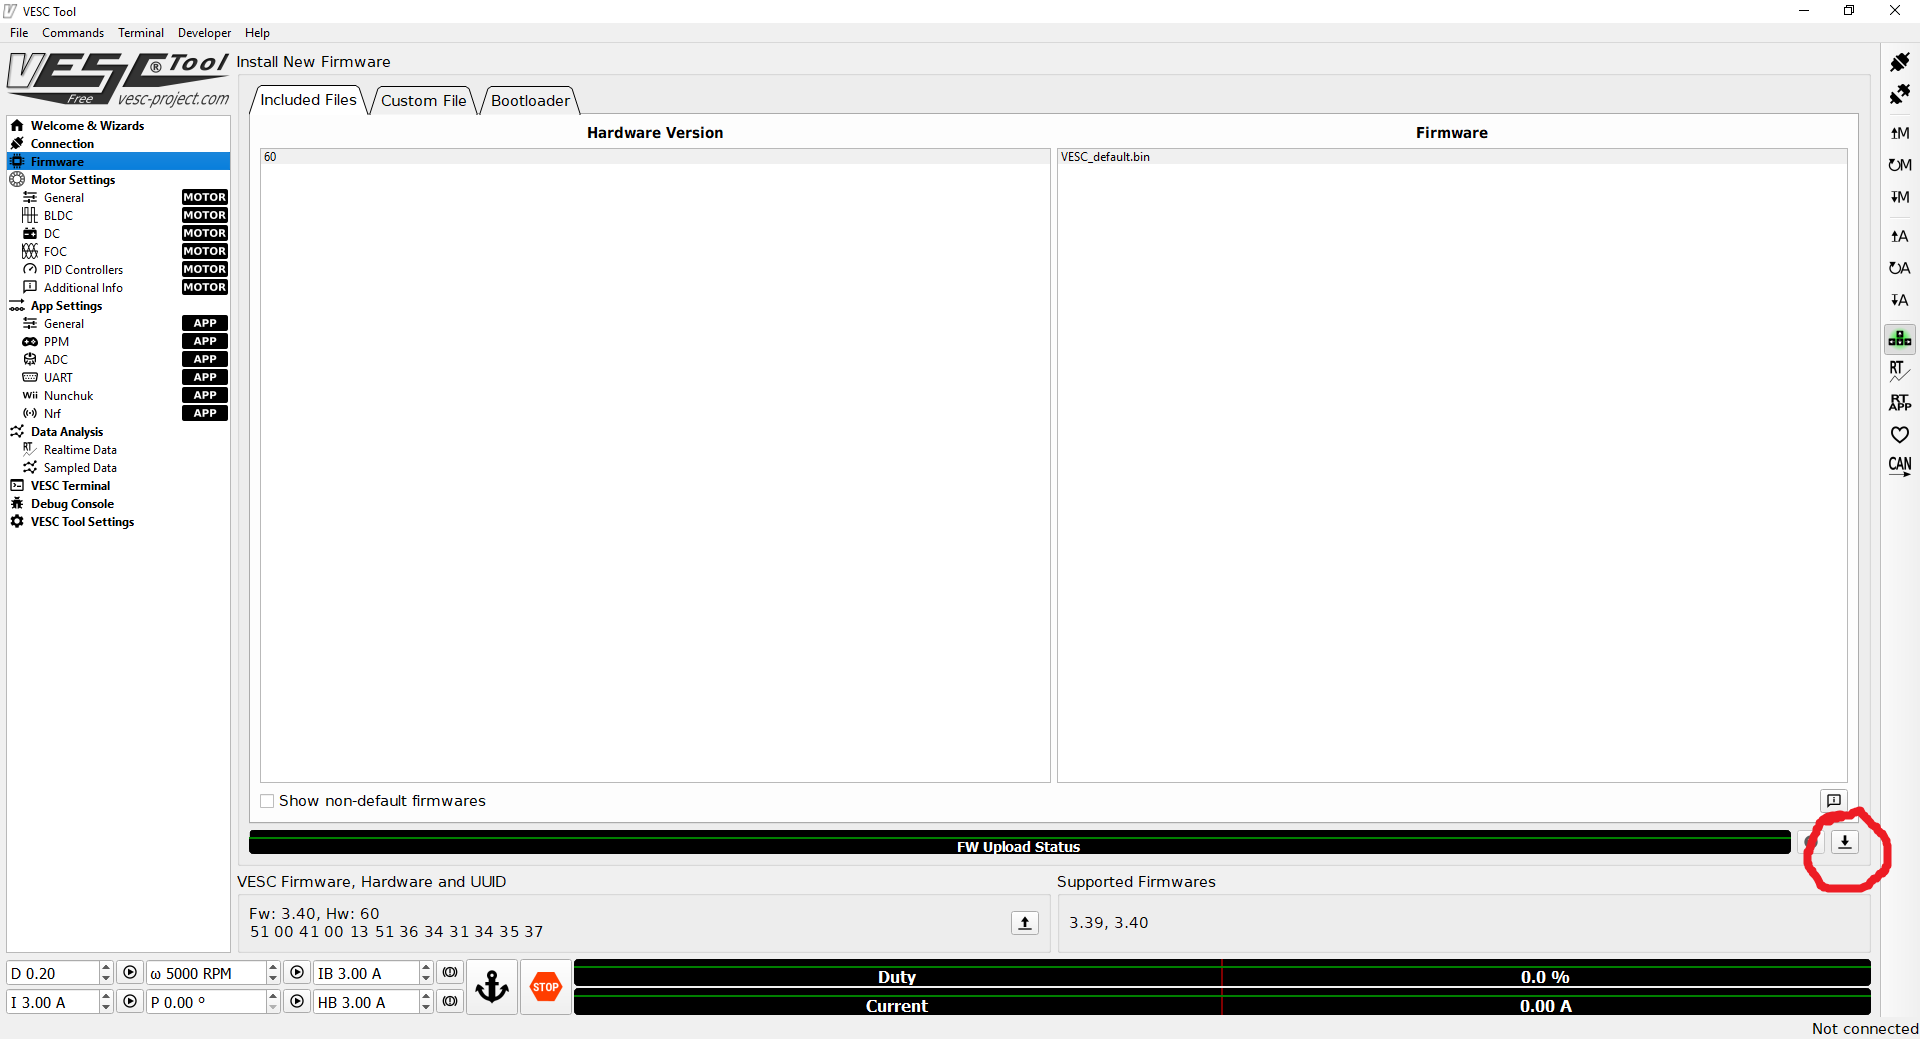
This is the Home screen of the Rapid Flash Tool. Very simple instructions, 4 bars at the top for selecting your flash tool, Com (which autoselects), software revision (just get the latest), and version of the file for the ESC. The toughest part will be figureing out which File you need for your ESC. Once again, the comments in most purchasing sites will tell you the file (for example, afro_nfet for most Afro ESCs).

rc2.jpg

All of us will want to go to the Advanced tab to set up the software. All the parameters you have been searching for and remembering in the KK Multicopter tool are ready to be filled out. You will want to leave the Beacon and RC Calibration checked, and then add the RC Puls Reverse for center stick forward/reverse operation, possible Motor Brake for center stick braking (no drifting), and I like the Blip Cell Count. You can trial and error the Motor Advance, but the 15-18 defualt works best with most motors. You can also play with the Brake Speed to match the performance of Brushed ESCs with a drag brake. If you need to customize your RC sensitivity, have at it.


Afro 12 to 30A ESCs - Afro_nfet file (bootloader)

ZTW Spider 18-60A ESCs - bs_nfet file (bootloader)

ZTW 18A Lite V2 - bs_nfet does not work!

TZ85A - bs (USBasp, no bootloader, atmel socket connector)

Friday 11.22.19
Posted by Emmanuel Carrillo
 

Soldering Motor Pinions

How to Solder a pinion onto a motor shaft.

Friday 11.22.19
Posted by Emmanuel Carrillo
Comments: 1
 

Servo Boards as Drives ESCs for Fairyweights (150g)

Original by Stuart (MySolderIsOlder)

So, further to earlier discussion under the thread 'Pre modded servo boards for ESCs', I did some more testing over the weekend. Not as much as I would have liked (weather was OK so had no excuse not to be repainting window frames  ) but enough to spark my interest. As per that other thread, idea was to test use of the tiny speed controllers taken out of servos which were designed with a) continuous rotation, and b) digital control instead of variable resistors. 
In theory, such controllers should be suitable for use as single-channel reversible ESCs with no further tinkering. I had two such controllers to test, taken from the Dorman RC servos (DM-S0090D-R ) suggested by Ant Ipodean and the FT90R from Feetech (former are ~£1.50 each from AliExpress when bought in ten packs, latter are around £3.00). Both are pretty small boards, though the Dorman's (top of each pic) are smaller:

3.jpg
yY9ZJ1s.jpg
aGFYeYn.jpg
3.jpg yY9ZJ1s.jpg aGFYeYn.jpg
The Feetech has the motor soldered directly to the board, hence the odd shape and large solder-through holes.


The Feetech has the motor soldered directly to the board, hence the odd shape and large solder-through holes.

After careful retesting I basically got the same results noted previously, i.e. the Feetech boards behaved perfectly (clear dead-band with 0v and full voltage at stick limits) while the Dormans showed around 0.5v in 'neutral' and didn't provide full voltage to the motors. These results were the same regardless whether I had a motor connected to the output or just the digital multimeter, so I don't think it could have been a back-resistance issue. Testing with just a motor, the Dormans caused a slow rotation (10-15 rpm) in neutral and were noticeably slower than the Feetechs at full throttle. No idea why I'm getting such different results from Mike with the Dormans boards - possible I'm doing something wrong or maybe I just got a duff batch. If there's anyone for whom the slight size and cost advantages are crucial then it's certainly worth persevering with them but personally I'm going to forget about the Dorman servos for the moment and stick with the Feetechs.

So... on with my efforts to bodge together a "Poor Man's Nano" or PMN as I'm now calling it. Goal is to have a reasonably consistent little package, as cheap, small and light as possible - but also reliable and easy to drive. I noticed with these controllers there is a slight delay switching from forward to reverse but we're talking less than half a second - so don;t think it will impair driveability in real world situations. Other than that, responsiveness seems excellent, with a proper proportional response as you move the stick gradually through its range.

First step, disassembling all the servos was strangely satisfying. They're generally very well put together and dismantle cleanly:

5.jpg

Removing the boards was pretty easy too - just hold the motor in a mini vice, melt solder on one side while gently bending the other way. All boards came off cleanly. 

6.jpg

Then just cleaned out the old solder using a simple solder pump (very easy with through-soldered holes if you hold the iron on one side of the board and the pump on the other). 

So - that's the ESCs sorted, now just needed receivers. In ideal world, I'd stick with the OrangeRx R614XN as they're the smallest DSM-compatible PWM options I've ever found - only they're a bit pricey at around £10 each and currently unavailable. Second best option, which I've come to rely on most of the time, is the Redcon CM421 4-ch Rx from BangGood. These are cheap (just bought a batch of 10 for £4.90 each), rated up to 10v (so no need for a BEC or voltage limiter when used with 2S LiPO) and pretty compact - except for the row of pins at one end. Futaba connectors are no good if you're after a really compact package (I'd rather have nice holes for through-soldering) - so they had to go. Having tried this a few times now, I find the best option is to slide/cut off the plastic 'comb'-like widget that holds the pins together, then clamp the board in a vice and desolder the pins one by one. It's then easy to clean out the holes using the solder-sucker (again - heating the solder from one side of the hole and sucking from the other). Takes me about 20 mins to complete. Here's how they look before and after pruning:

It's then a case of carefully trimming the ESC leads down to length and stripping the ends (with such short leads be very careful not to pull the whole insulation sleeve off, like I did a couple of times!) and soldering them onto the back of the Rx board, along with any other required leads. In my case that's the power supply (red & black) throttle-channel signal pin (white) and bind pin (grey - this needs shorting to GND to initiate binding), plus blue & yellow for the motor leads. I used 24AWG silicone insulated wire throughout:

8.jpg

After a quick test, then wrapped the individual ESCs in heat-shrink, folded everything into place and wrapped it all up in clear heat shrink (so I can still see the Rx LED). 

9.jpg
10.jpg
11.jpg

Resultant package is about 31x17x9mm and weighs 5.5g (including wires). So... not quite as dinky as a real Nano but small enough and cost less than £12 to make - so it's good enough for me! Incidentally, that tiny plug & header in the photo is a JST-SH 2-pin micro connector (1mm pitch) which I'm experimenting with for binding - plan is to have a header with the pins shorted so I can just slide that on to put it in bind mode. Weighs next to nothing and less likely than a tiny slide switch to engage accidentally.

Managed to put together two PMN units in one afternoon and both worked a treat. 


Tested using 2S LiPO and one motor per controller. Left it running full speed for 5 mins - no noticeable overheating issues. Obviously, this kind of bench testing is no substitute for the real thing, so plan is to make a quick & easy 4WD antweight and let my son thrash it around our test arena for a while. If it survives him an his little friends, it should survive anything.


So finally... 
just tested the other type of Feetech FT90R esc as arrived today; what I’ll call the “Feetech short board”.

This time, instead of the longer boards with the motor soldered on directly, the 20-pin quad-flat package micro and the AM1096 motor driver, these new ones have smaller (9x12mm) boards with short leads to the motor, an unmarked 8-pin DIP micro and TC118S motor drivers... 


Good news is it’s got a clean dead band and supplies full voltage to the motor. Bad news is that the proportional response sucks - not much gradation between off and full throttle.
So, better than Doman blue boards, roughly on par with Doman green board, not a patch on Feetech “long board”.
Here are the front and back views 

12.jpg

Firstly, I think I now know why I was seeing a much reduced voltage at the motors using the DomanRC boards. Standard DSM Tx/Rx combo is meant to give a control pulse in the 1-2ms range, with 1.5ms as zero - and I think that's pretty much what I get from my Spektrum DX6i with the default -100% to 100% endpoints. That was giving me +/- 4v with the DomanRC c/r servos. With the Digital Servo tester, which runs from 0.8-2.2ms, I was getting nearer 5.5v at the ends, and I was able to get something close to that after setting the Tx endpoints to 125%. In other words, looks like these DomanRC servos are designed to work over a wider than usual range of pulse widths. The description for one of their other digital servos (a 270 degree version) specifies a PWM range of 0.5-2.5ms is required for maximum movement - so I'm guessing with the 360 degree version you'd need a similar PWM range to get maximum voltage (100% duty cycle) to the motors.
Secondly, using the 'green-pcb' Doman board that Antipodean sent me, I got a pretty good proportional response over the full range. Dialing the tester up from 0.8ms to 1.4ms, voltage changed in a reasonably linear fashion from -5.5 to -2.3, then dropped suddenly into the dead band, kicking back in again to +2.3v at 1.6ms. So, a small cliff-edge either side of the dead band but still very good.

Doing the same test on the two variants of the Feetech FT90R boards, the long board showed a healthy degree of proportionality - steady -6.2v (full battery voltage) from 0.8 to 1.3ms, then a very smooth slope all the way down to zero at 1.45ms, picking up again at 1.55ms. This matches my experience of driving my test bot utilising these boards, where I was able to make it crawl along with a gentle stick movement but pushing the stick beyond about half way resulted in full speed. Might even be worth reducing the endpoints in this instance to increase the proportional stick range.
By contrast, the FT90R short board is about as proportional as our FPTP electoral system - it was delivering full voltage from 0.8 to 1.45ms then dropped to zero almost immediately, jumping back up to full voltage again at 1.55ms. Basically, it's on or it's off with a difference of maybe 30 microseconds in pulse width between the two extremes (it was quite hard to measure but the 'proportional phase' only seemed to be around 1.44-1.47ms so I don't think any amount of Tx tuning is going to help there.)

So... to conclude (phew!)... either the Feetech FT90R long board variant or the DomanRC 'green pcb' variant should make a fine ESC, though with the latter you'll want to ensure your Tx/Rx can go well beyond the 1.0-2.0ms pulse width range in order to get maximum speed. By contrast, the Doman blue PCB (no dead band) or FT90R short-board (no proportionality) versions should be avoided. Trouble is of course, you won't know which variant you've ordered until they arrive!

Promise I won't say any more about this, though I will be interested to hear other peoples' experiences of these servo boards.
Stuart


Regarding the differing experiences when testing the Doman servo boards, thanks to Mike (Ant Ipodean) the mystery is solved. He very kindly airmailed me one of his stock of Doman boards to test. 

When I repeated my tests using Mike's board, my observations were the same as his, i.e. there is a clear 0v dead-band in the middle, at full stick the voltage is 2-3v below supply voltage when connected with just a multimeter but only around 1v below supply when the voltmeter is connected in parallel with an N20 motor. By comparison, my version of the Doman boards had around 0.3v (enough to turn a motor) in neutral and were 2-3v below supply regardless whether a motor was connected or not. 
(I'm guessing that on both cases, the voltage drop is because the PWM isn;t reaching 100% duty cycle but with no access to an oscilloscope I can't confirm that. By comparison, the Feetech boards I've been using deliver the full battery voltage to the motors.)

Clearly, these differences are not accountable for by normal manufacturing quality variation - and make a huge difference to whether these servo boards are suitable for ESCs or not. However, it was immediately obvious on inspecting the boards that Doman must have changed design and/or suppliers at some point - the PCBs are not even the same colour and have a number of track differences. In terms of the SMD components, always hard to get definite IDs but...

Mike's Doman board (green PCB)
Regulator: V1QG
Driver: FZMOS-5X
Other: 2x resistors, 3x capacitors, unmarked 8-pin microcontroller

My Doman boards (blue PCB)
Regulator: 662x 
Driver: FZMOS-2
Other: 1x resistor, 3x capacitors, unmarked 8-pin microcontroller

Spot the differences in these front and back views; my board is the blue one on the left in each case:

13.jpg
14.jpg

So.... hard to say whether it's worth buying the Doman servos for use as ESCs as it all depends which version they send you. Chances are, if you get the green board you'll be  but if you get a blue board, you'll be  No idea whether the blue boards were a permanent change or maybe just clearing older, faulty stock during temporary supply difficulties - but I'd be v interested to hear other peoples' experiences.

Personally, I'll stick with the Feetech FT90R boards (see other thread "Follow up on Digital CR Servo Board ESCs" for details). They are twice the price (£3-4 each from AliExpress, depending on quantity) and slightly longer - but being a well established brand, they should be more consistent and in all my testing so far they've been impeccable; no DOA units, clear dead band, full supply voltage to the motor and excellent proportional response.

Thanks again to the Auckland Antmeister for his assistance in clearing this up - and to Hogi for setting me on the 'pre-modified continuous rotation servos' path in the first place!

Stuart

Tuesday 06.18.19
Posted by Emmanuel Carrillo
Comments: 2
 

Castle Creations Mamba XLX in Brushed Mode for Heavyweight Drive.

Originally by Orion Beach

Well there seems to be some more interest in big Castle Creations ESC's being used in brushed mode, so I'll share some of the info gained through running Skorpios around on that setup.

First off Skorpios's drive runs the older version of the 1/5th scale buggy oriented ESC the XL2, the current on that's available is called the XLX, it very similar, the three big changes are a beefed up BEC, external caps, and a dedicated AUX programing wire.

Wiring and programming wise, it's pretty straight forward with the USB programmer once you know how all the settings work. I recommend flashing the most current firmware and reading the patch notes. Setting wise the big things to change for good roboting are, Brushed reversing, 0% brake amount setting, drag brake to desired level (I liked the crawler setting), Crawler reverse, 100% reverse power, and no low voltage cutoff. For wiring, just use the red and black output and tape off the yellow/white wire and not connect it.

Issues:
For a while I didn't understand what the different braking settings were doing, brake amount setting just isn't what we want for combat. It should be turned all the way off, even with Crawler reverse on it just behaves wrong. This was a big issue during season 2 and it masked a receiver issue we were having at the same time. Once this was turned off the receiver issue was easily apparent and after replacing the receiver the bot drove great. 
Another issue that we've heard about, but haven't had, is controllers dieing from shock loads. Partially that's thanks to some great advice from Kevin Barker, he recommended at least 1/2" of padding, we have, we haven't killed an ESC. 
Current limiting, this controller has a current limiting setting, don't expect it to act like a RageBridge this is a hobby controller, my best guess is it watches current going into the controller, so the output could greatly exceed that for short periods of time. So the issue is at the previously set 175 amp limit these controllers can easily melt an A28-400 and barley get warm. A 100 amp limit and out setup seemed about right for the S28-400 MagMotors we ran for this latest go of Battlebots. With the controllers not really getting warm and space at a premium I did remove the fans, I think for this application it's fine YMMV.

Thursday 05.02.19
Posted by Emmanuel Carrillo
Comments: 1
 

Beginners Guide to Programming VESC for Robot drive.

Originally by Rory Mangles

First you'll need to get the VESC tool from here:https://www.vesc-project.com/vesc_tool 

Once installed, connect the VESC to the motor, receiver, and batteries you want to use, and make sure the lights on the VESC are on, then connect the VESC to the computer via a USB cable. Once the VESC Tool is open, click the Connect button (Circled in red). First time you use it it will likely ask for a firmware upgrade, if not you can skip the next step.

Often a message will appear stating the VESC has old firmware. To fix this click the 'Firmware' tab in the top left, and then click the download button circled in red. The VESC Tool will already have selected the correct firmware for your device so there's no need to select any manually.

The VESC Tool will then take a few seconds to upload the latest firmware to your VESC. The VESC will then disconnect and flash a warning not to power it off while the VESC is installing the new firmware. After 10 seconds or so, go back to the front page and hit 'AutoConnect' again. This time it should say the latest firmware is installed.

2.png

Once the VESC is connected and the latest firmware version is uploaded, hit the 'Setup Motors FOC' button on the front page. This wizard will take you through the motor setup procedure step by step.

151534535_1776351592539445_3832292481077767462_n.png

First step is to select the approximate motor size. Its better to undersize here than over size if you're not sure, as this is less likely to damage things, but its not super critical to get exactly right. For example 6374 sized motors are medium outrunners. For inrunners, scroll down. Hit next once the correct size is selected

151319353_1776351559206115_8694995321076316708_n.png

Next step is to select number of battery cells. This sets up the low voltage cut off, so don't set it too high. You can leave it at the default of 3 cells if you want to effectively disable the low voltage cutoff.

It then asks you to set up gear ratios and pulley diameters. This is of no use unless you are planning on using telemetry as it’s just to give your wheel speed, so usually can be ignored. At this point press 'Run Detection (no CAN)' (or 'Run Detection', it makes a minimal difference if you have no CAN bus set up).

It will give you a warning saying it’s going to spin the motor. Once you accept it will make some alarming noises and the motor will move around a bunch.


If all goes well a box will pop up informing you that it was successful and provide a load of motor parameters. If you're running sensors be sure to detect that they were detected correctly (This test was done with a sensorless motor). If they didn't detect, double-check your sensors are connected and functioning correctly. Hit Ok once you are ready.

You are then given the option to test which way the motor is spinning and invert the direction if needed. This is also good chance to test that the motor spins as expected. Pressing either Fwd or Rev will spin the motor slowly in either direction. Hit 'Finish' once you are done.

151787519_1776351722539432_2785641279629983687_n.png

Press the 'Input Setup Wizard' on the main page and select load default config. Once thats done, the list above will appear. Assuming this is a 2wd robot with one motor a side, select 'Single VESC'. For 4wd or 2 motors per wheel, you can either use CAN bus, which is configured using the other two buttons, or you can set each VESC up seperately and just use the same servo output from the RX with a Y lead.

151964029_1776351602539444_1524490001504072001_n.png

Select PPM input for Servo signals

10.png

Turn on your transmitter and make sure the RX is connected. Select Duty Cycle mode, click refresh in the bottom right, then move the stick up and down fully. The bars on the bottom right should move with the stick. Once you've done that, let the stick rest in the center, and click Apply

vesc.png

PPM Configuration is where you set up how the VESC responds to inputs. For most robot applications you want to use “Duty Cycle” mode, which controls the motor speed with stick position. Next, you want to set 'Median Filter' and 'Safe Start' to 'False'. This allows the VESC to recover immediately after a fault without having to center the sticks. This is vital as a VESC will often flag an error after a current spike from a big spinner hit or similar, so turning these off means it immediately recovers automatically. You also have the option to adjust the ramping time, which is how fast it responds to your stick inputs. Generally, you don't want these to be zero as the controller may lose track of the motor while trying to keep up with the stick movements. 0.2 seconds generally works well for the drive, but larger values can be used for weapons to ensure a reliable spin-up.

Once these are set, hit 'Write Configuration to VESC' and then 'Next' and you are done! The motor should now spin when you move the stick.


151929572_1776351629206108_1653578514536971241_n.png

In most cases the default setup will be fine and no other settings need changing, but there are a few points worth knowing in case issues crop up. The motor current (which sets the max torque) will be set automatically by the detected parameters and is generally pretty accurate as to the max current the motor can happily handle. You can turn it up a bit but usually this leads to the motor overheating. The 'Absolute Maximum Current' setting is the current at which the controller will flag an error. DON'T TURN THIS DOWN unless you want your robot cutting out all the time.
The -ve motor and battery currents set your regen. Especially with weaponry, its best to turn the -battery current down to around -10A to stop it from charging the batteries to quick and damaging them. Don't set it too low as this can cause a bug where the motor doesn't stop spinning.

After any changes hit the 'Write Motor Config' button (M with a down arrow in the top right) in order to write the changes to the VESC.

Big Dill Drive Setting: Bold is what you need to change

Motor Max: 60a
Motor Brake: -30a

Abs Max: 150a
ABS Limit: True
Max/Min Scale: 100%
Battery Max: 99a
Battery Regen: -40a
OC Mode: Current Limit
OC Adjusment: 16


A common issue is a motor cutting out after quickly throttling up. This is due to the current ramping too quickly and going over the Absolute Max Current limit. To fix this KP and KI can be adjusted. The settings for this are found under the FOC tab, though these apply whether using FOC or BLDC mode. Try increasing KP and KI by 10x, write the motor config and try again. If this improves things keep adjusting around until the motor gets up to full speed consistently without cutting out. There's probably a more scientific method to this, but trial and error is the easiest and has a low risk of damaging things.

Thursday 05.02.19
Posted by Emmanuel Carrillo
Comments: 1
 

Brushless P60 Drive for Robotics

For Brushless P60s. Get the Rs-500 or RS500/700 Backplate. Then get the 700s series pinon. This gives you a 25mm bolt pattern, as well as a 5mm bore pinion. I like the combo plate as it gives you more flexibility down the road.

Cut the brushless shaft with a Dremel (no need to disassemble) to 14mm from the face and use an arbor press to press the pinion.

12lb Common combo is a P60 16:1 paired with NTM Propdrive v2 3536 910kv or Sk3 3536-1050kv at 6S gives you about 16-18Fps

30lb Common Combo is 16:1 P60s paired with SK3 4240 or NTM 4238

5s or 6s Lipo with at least 50a ESCs. Blue Series 50a and ZTWs 50/60s have been proven to work. 80a recommended for the 30lbs.

Base Simon K settings: 
RC_PULS_REVERSE = 1 
RC_CALIBRATION = 0 
MOTOR_BRAKE = 1 
BRAKE_SPEED = 8

Additional comments: 
If you have weight you can get the Steel ring gear. At $5 I think its worth the security.

Also, the gearbox bearings are 3/8" So the 1/2" shaft is 3/8" through the gearbox, but necks up after it exits the gearbox. I recommend getting the 3/8" shaft since the wheel shaft is essentially only 3/8" inside the gearbox. Save some weight.

Cheaper to buy the Mobil XHP222 grease from McMaster and very easy to grease yourself. Just add a pea size to every stage as you reassemble. 
https://www.mcmaster.com/#1416k14/=19vu8g2

Thursday 05.02.19
Posted by Emmanuel Carrillo